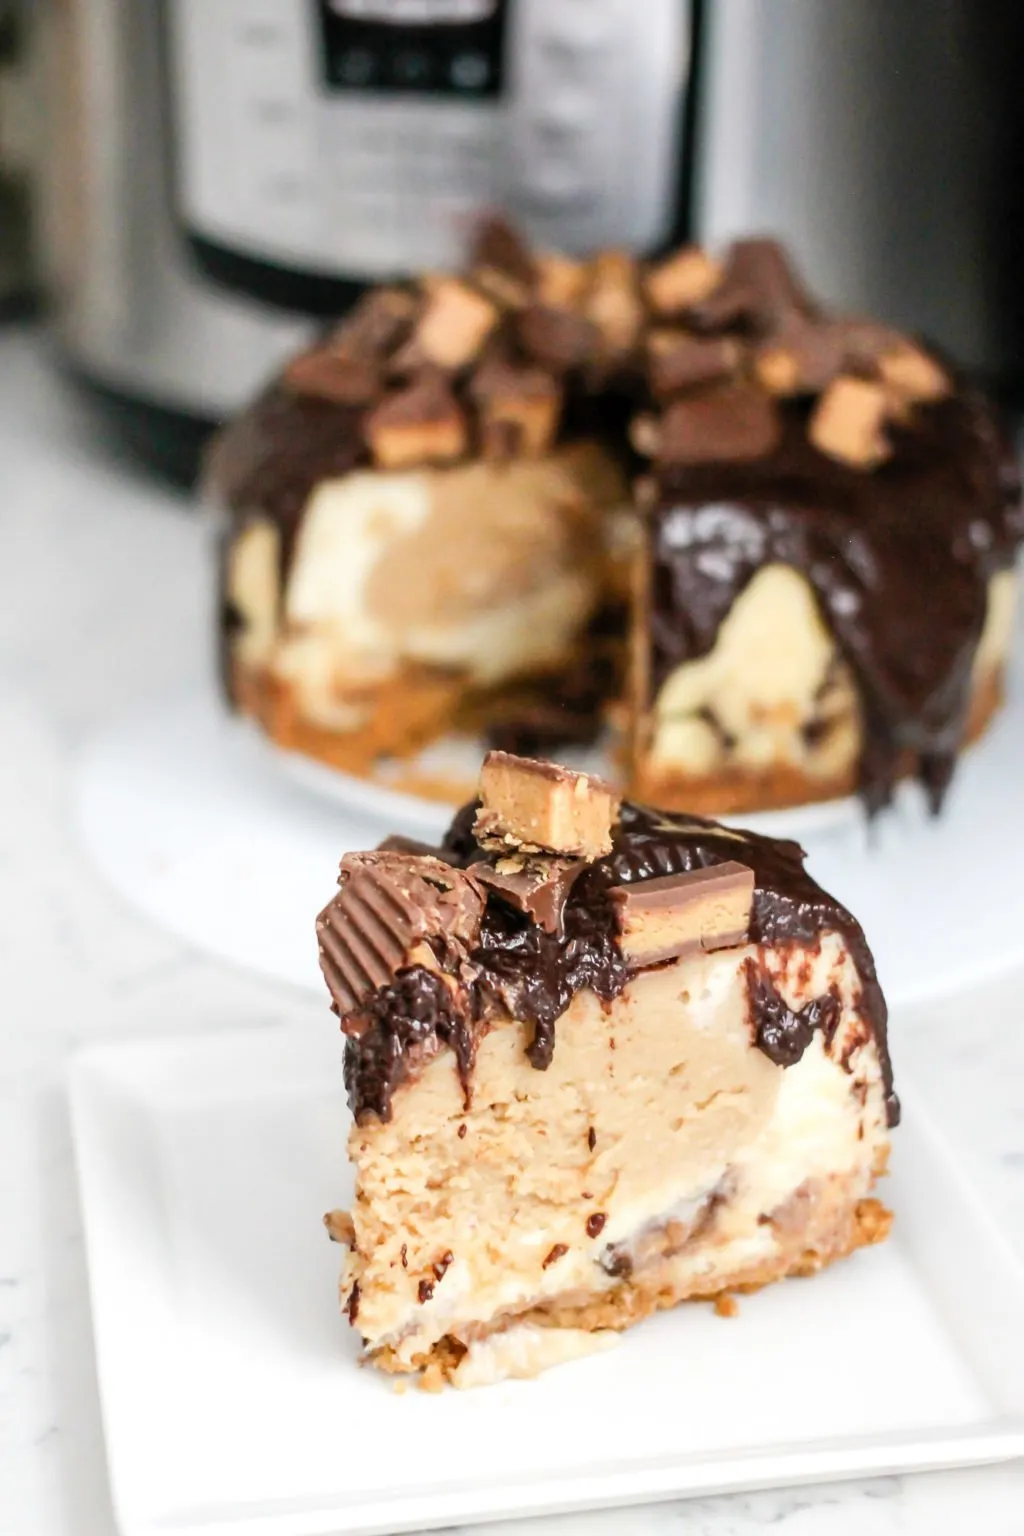
Imagine sinking your fork into a creamy, decadent cheesecake that combines the rich, nutty flavor of peanut butter with the luxurious sweetness of caramel - all created with the magical ease of an Instant Pot! This show-stopping dessert is about to become your new obsession, promising a dessert experience that's both incredibly delicious and surprisingly simple to prepare. Whether you're a cheesecake connoisseur or a novice baker, this recipe will transform your kitchen into a gourmet dessert haven in just under an hour!
Prep Time: 15 mins
Cook Time: 40 mins
Total Time: 55 mins
Cuisine: American
Serves: 8 servings
Ingredients
- 1 1/2 cups graham cracker crumbs
- 1/2 cup unsalted butter, melted
- 2 cups cream cheese
- 1 cup peanut butter
- 1 cup granulated sugar
- 3 large eggs
- 1 cup caramel sauce
Instructions
- Prepare the springform pan by lightly greasing a 7-inch springform pan with cooking spray. Cut a parchment paper circle to line the bottom of the pan for easy removal.
- Create the graham cracker crust by mixing graham cracker crumbs with melted butter in a medium bowl until the mixture resembles wet sand. Press the mixture firmly into the bottom and slightly up the sides of the prepared springform pan.
- In a large mixing bowl, beat the cream cheese and peanut butter together until smooth and completely combined, using an electric mixer on medium speed. Scrape down the sides of the bowl to ensure no lumps remain.
- Gradually add granulated sugar to the cream cheese mixture, continuing to mix until fully incorporated and the mixture is creamy and smooth.
- Add eggs one at a time, mixing thoroughly after each addition. Be careful not to overmix, as this can cause the cheesecake to crack during cooking.
- Pour the cheesecake batter into the prepared crust-lined springform pan. Tap the pan gently on the counter to release any air bubbles.
- Prepare the Instant Pot by adding 1 cup of water to the bottom of the inner pot. Place the trivet inside the pot.
- Carefully lower the springform pan onto the trivet using a long-handled sling made of aluminum foil for easy removal.
- Close the Instant Pot lid, set the valve to sealing, and cook on high pressure for 40 minutes. Allow for a natural pressure release for 10 minutes after cooking.
- Once the pressure has naturally released, carefully remove the cheesecake and let it cool at room temperature for 1 hour.
- Refrigerate the cheesecake for at least 4 hours or overnight to allow it to set completely.
- Before serving, drizzle the caramel sauce generously over the top of the chilled cheesecake. For extra indulgence, sprinkle some chopped peanuts or additional graham cracker crumbs on top.
- Slice and serve chilled. Store any leftovers in an airtight container in the refrigerator for up to 5 days.
Tips
- Room Temperature Ingredients: Ensure your cream cheese, eggs, and peanut butter are at room temperature for the smoothest, lump-free batter.
- Prevent Cracks: Avoid overmixing the batter and be gentle when adding eggs to prevent air bubbles that can cause surface cracking.
- Foil Sling Technique: Create a foil sling for easy removal of the springform pan from the Instant Pot, ensuring your cheesecake comes out perfectly intact.
- Natural Pressure Release: Always use a natural pressure release for cheesecakes to prevent sudden temperature changes that can cause surface cracks.
- Chilling is Crucial: Allow the cheesecake to cool completely and chill for at least 4 hours (overnight is even better) to achieve the perfect texture.
- Caramel Drizzle Tip: Warm the caramel sauce slightly before drizzling for a more elegant and easy-to-pour presentation.
- Storage Hack: This cheesecake actually tastes even better the next day, so don't hesitate to make it in advance of your event!
Nutrition Facts
Calories: 650kcal
Carbohydrates: 55g
Protein: 15g
Fat: 45g
Saturated Fat: 22g
Cholesterol: 160mg