Get ready to elevate your snacking game with these Easy Blinged Out Caramel Apples! Perfect for any occasion, these delectable treats combine the classic sweetness of caramel with a delightful crunch from nuts or sprinkles, making them a hit at parties, fall gatherings, or even as a fun family activity. With just a few simple ingredients and a quick 25-minute prep time, you'll impress your friends and family with these stunningly delicious desserts. Dive into the world of caramel goodness and discover how easy it is to create your very own gourmet-style treats that are as fun to make as they are to eat!
Prep Time: 15 mins
Cook Time: 10 mins
Total Time: 25 mins
Cuisine: American
Serves: 4 servings
Ingredients
- 4 medium apples
- 1 cup caramel candies
- 2 tablespoons water
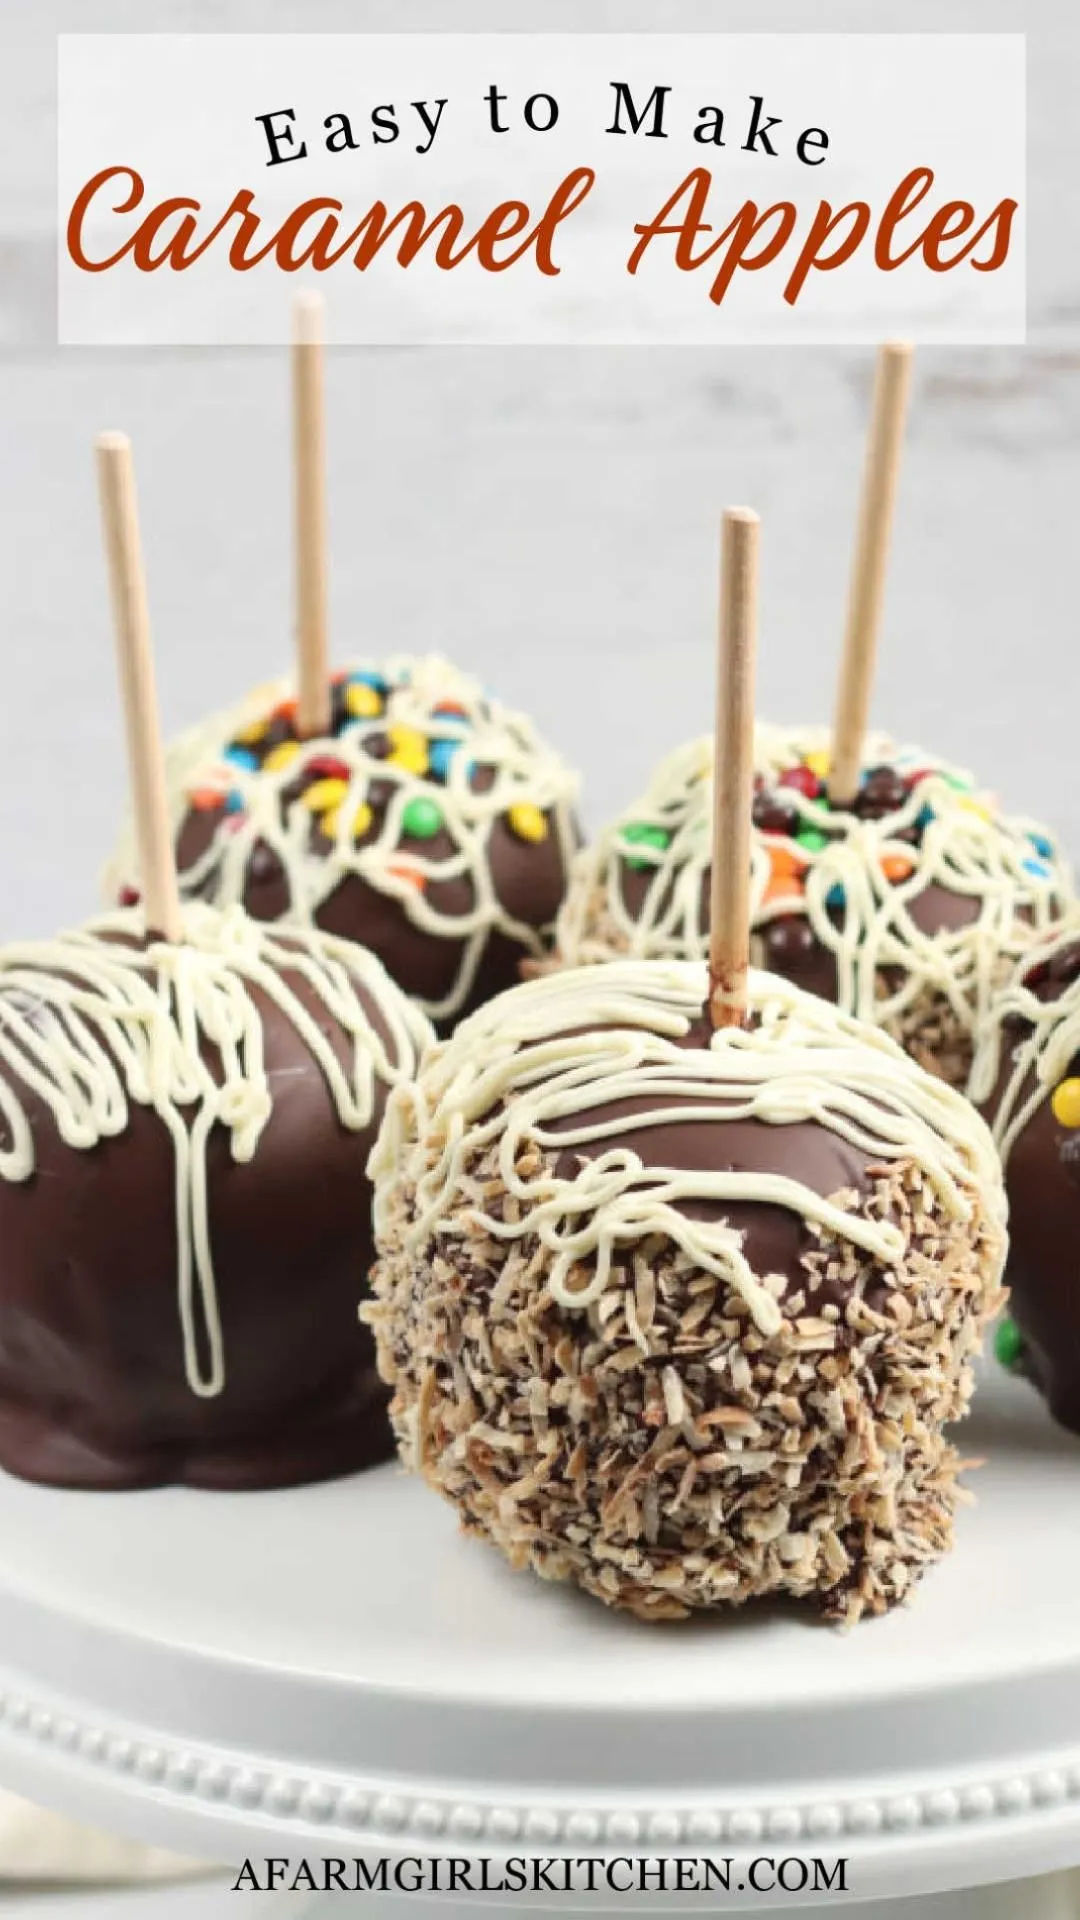
- 1 cup chopped nuts or sprinkles
- 4 wooden sticks
Instructions
- Begin by preparing your work area. Lay out a sheet of parchment paper or a silicone baking mat on a flat surface. This will be where you place the caramel apples once they are coated.
- Wash the apples thoroughly under cold water to remove any wax or residue. Dry them completely with a clean towel. This step is crucial as moisture can prevent the caramel from adhering properly.
- Insert a wooden stick into the stem end of each apple, pushing it in about halfway. This will serve as the handle for dipping the apples in caramel.
- In a medium saucepan, combine the caramel candies and the water. Heat over low to medium heat, stirring constantly until the caramel is melted and smooth. This should take about 5-10 minutes. Be careful not to let it boil, as this can cause the caramel to harden.
- Once the caramel is fully melted, remove the saucepan from heat. Allow the caramel to cool slightly for a minute or two so it thickens just a bit, making it easier to coat the apples.
- Take one apple at a time and dip it into the melted caramel, swirling it around to ensure it is fully coated. Allow any excess caramel to drip off before placing the apple on the prepared parchment paper.
- While the caramel is still warm and sticky, roll the coated apple in your choice of chopped nuts or sprinkles. Make sure to cover the caramel evenly for a delightful crunch and added flavor.
- Repeat the dipping and coating process for each apple until all are finished. If the caramel begins to thicken too much, you can gently reheat it over low heat for a minute.
- Once all the apples are coated and decorated, let them sit at room temperature until the caramel sets, which should take about 10-15 minutes. If you want to speed up the process, you can place them in the refrigerator for a few minutes.
- After the caramel has set, your Easy Blinged Out Caramel Apples are ready to be enjoyed! Serve them as a fun treat for parties or a delightful snack for yourself.
Tips
- Choose the Right Apples: Opt for firm apples like Granny Smith or Fuji, as their tartness complements the sweetness of the caramel perfectly.
- Prep Your Workspace: Before you start, ensure your workspace is clean and organized. Having everything ready will make the process smoother and more enjoyable.
- Dry Apples Thoroughly: After washing, make sure to dry the apples completely. Any moisture can cause the caramel to slide off, so this step is crucial for a perfect coating.
- Control Caramel Temperature: Keep the heat low to medium when melting the caramel. This prevents it from boiling and hardening too quickly, ensuring a smooth, creamy texture for dipping.
- Customize Your Toppings: Get creative with your toppings! Beyond nuts and sprinkles, consider using crushed cookies, coconut flakes, or even drizzling melted chocolate for an extra indulgent treat.
- Let Them Set: Allow the caramel apples to sit at room temperature for at least 10-15 minutes after coating. This helps the caramel firm up properly, making for a mess-free eating experience.
- Store Properly: If you have leftovers, store them in a cool, dry place, preferably in a single layer to prevent sticking. Enjoy them within a few days for the best taste and texture!
Nutrition Facts
Calories: kcal
Carbohydrates: g
Protein: g
Fat: g
Saturated Fat: g
Cholesterol: mg