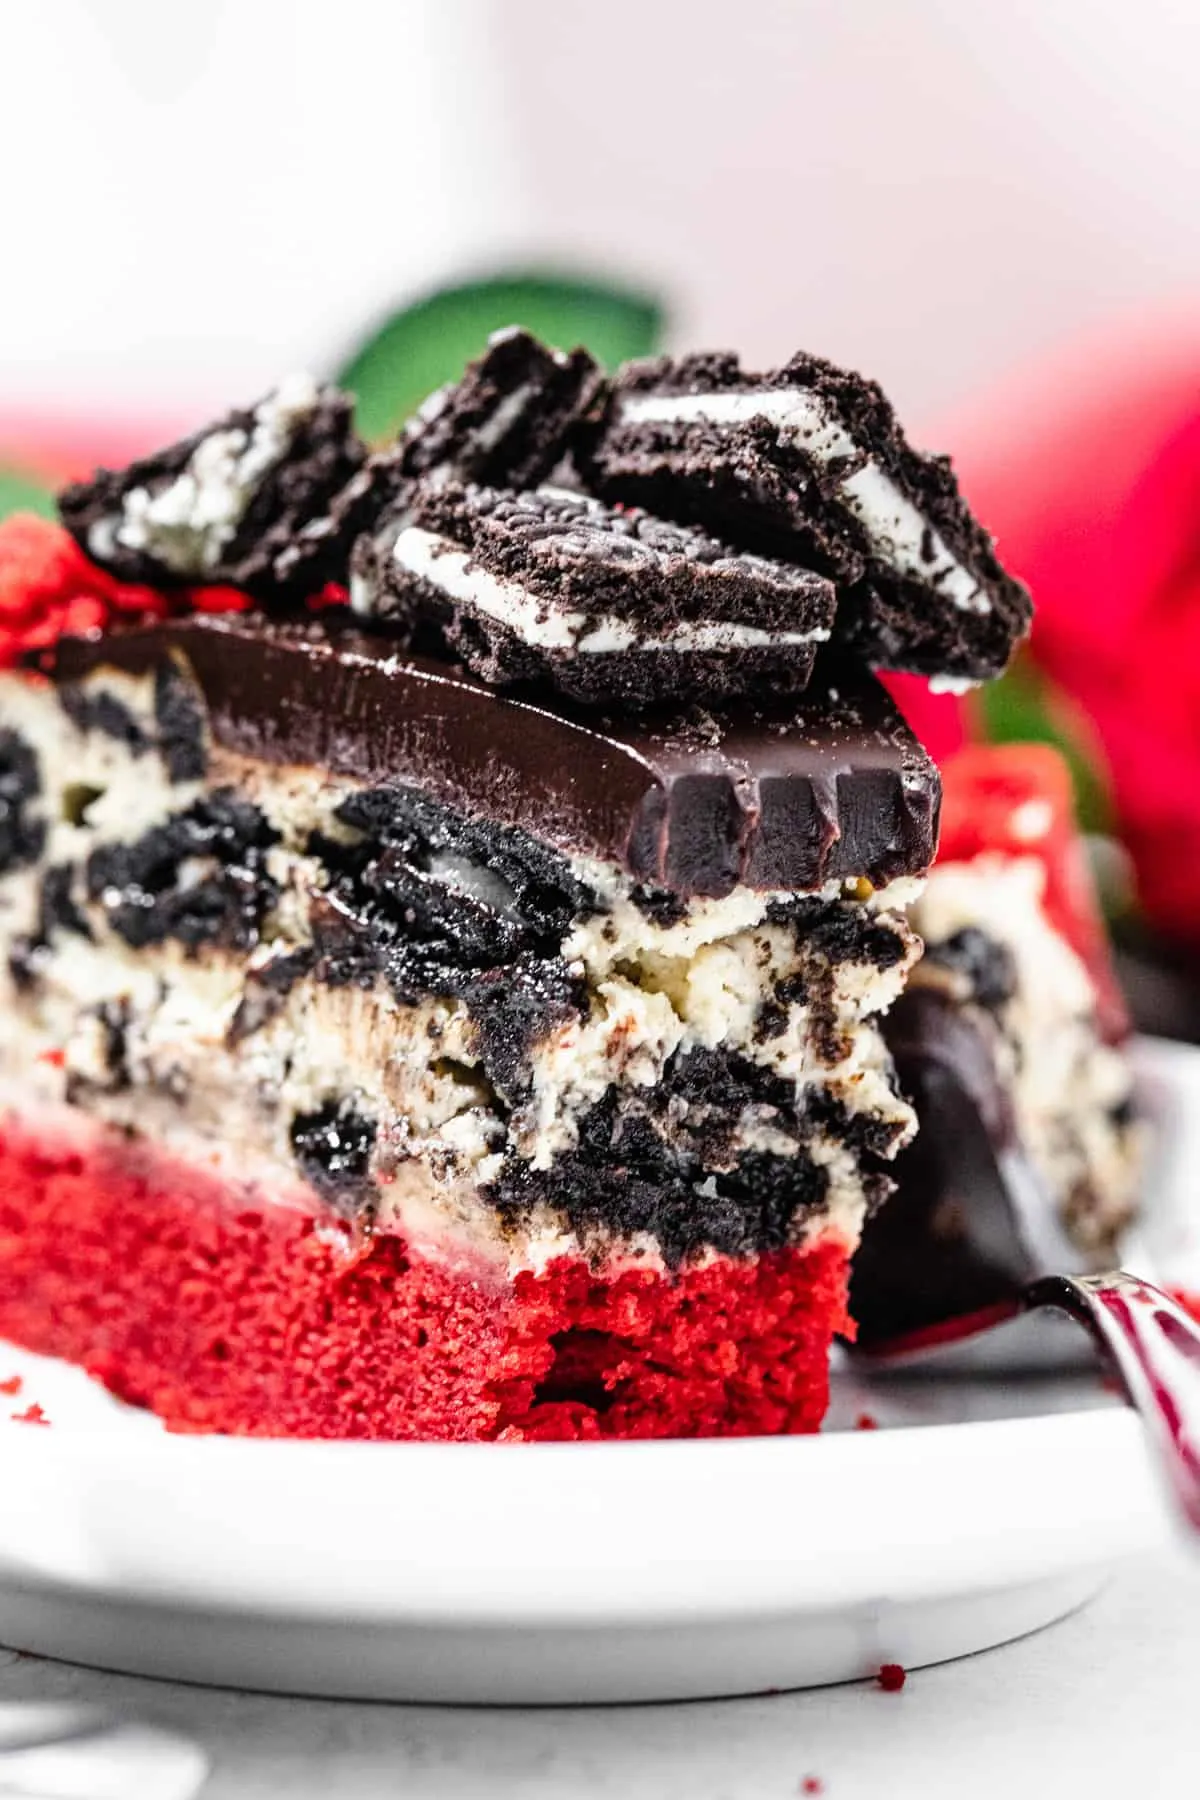
Indulge your senses with a dessert that’s as decadent as it is delightful! The Red Velvet Oreo Cheesecake Icebox Cake is the perfect fusion of rich red velvet, creamy cheesecake, and crunchy Oreo goodness, making it a showstopper for any occasion. Whether you're hosting a party or simply craving something sweet, this no-bake treat will leave your guests begging for seconds. With just 30 minutes of prep time, you can whip up this stunning dessert that requires no oven and delivers maximum flavor! Ready to impress? Let’s dive into this irresistible recipe!
Prep Time: 30 mins
Cook Time: -
Total Time: 30 mins
Cuisine: American
Serves: 12 servings
Ingredients
- 1 package red velvet cake mix
- 1 cup water
- 1/2 cup vegetable oil
- 3 large eggs
- 1 package cream cheese (8 oz)
- 1 cup powdered sugar
- 1 teaspoon vanilla extract
- 1 cup heavy cream
- 1 package Oreo cookies
Instructions
- Preheat your kitchen by gathering all the ingredients and tools you will need. This includes a mixing bowl, a hand mixer or stand mixer, a spatula, a 9x13 inch baking dish, and a serving platter for the finished cake.
- In a large mixing bowl, combine the red velvet cake mix, 1 cup of water, 1/2 cup of vegetable oil, and 3 large eggs. Using a hand mixer or stand mixer, mix on medium speed until the batter is smooth and well combined, about 2-3 minutes.
- Once the batter is ready, set it aside. In a separate bowl, prepare the cream cheese layer by softening the 8 oz package of cream cheese. Beat the cream cheese with the hand mixer until it is creamy and smooth.
- Add 1 cup of powdered sugar and 1 teaspoon of vanilla extract to the cream cheese. Mix on low speed until the sugar is incorporated, then increase to medium speed and mix until the mixture is fluffy and well combined.
- In another bowl, whip 1 cup of heavy cream until stiff peaks form. Gently fold the whipped cream into the cream cheese mixture until fully combined. This will create a light and fluffy cheesecake layer.
- Now, it's time to assemble the icebox cake. Start by spreading a thin layer of the cream cheese mixture on the bottom of the 9x13 inch baking dish.
- Next, take the Oreo cookies and dip each one briefly in water to soften them slightly, then layer them over the cream cheese mixture in the dish. You can break some cookies if needed to fit them nicely.
- After placing the Oreos, spread another layer of the cream cheese mixture on top of the cookies. Repeat the layering process by adding another layer of dipped Oreos followed by more cream cheese mixture. Continue this process until you run out of ingredients, finishing with a layer of the cream cheese mixture on top.
- Once assembled, cover the dish with plastic wrap and refrigerate for at least 4 hours, or preferably overnight, to allow the flavors to meld and the cake to set properly.
- When ready to serve, remove the icebox cake from the refrigerator. Slice into squares and serve chilled. Enjoy your delicious Red Velvet Oreo Cheesecake Icebox Cake!
Tips
- Ingredient Prep: Make sure all your ingredients are at room temperature before starting. This ensures better mixing and a smoother texture for your cheesecake layer.
- Mixing: When mixing the cream cheese, ensure it's softened well to avoid lumps. Beat it until creamy before adding the powdered sugar and vanilla extract for a fluffy consistency.
- Whipping Cream: For the best results, use chilled heavy cream when whipping. This helps achieve stiff peaks more easily, resulting in a lighter cheesecake layer.
- Layering: When dipping the Oreo cookies, do it quickly to avoid them becoming too soggy. A brief dip is enough to soften them without losing their structure.
- Chill Time: Although the recipe suggests chilling for at least 4 hours, letting it sit overnight allows the flavors to meld beautifully and enhances the overall taste.
- Serving: For a clean slice, use a sharp knife dipped in warm water to cut through the layers. Wipe the knife clean between cuts for neat squares.
- Garnish: Consider topping the finished cake with crushed Oreos or a drizzle of chocolate sauce for an extra touch of elegance when serving.
Nutrition Facts
Calories: kcal
Carbohydrates: g
Protein: g
Fat: g
Saturated Fat: g
Cholesterol: mg